Guides
Part of From blade control to the final blend check: a clipper cutting guide
Building a low taper with conservative baselines and clean transitions
Build a low taper with agreed boundaries, conservative baselines, controlled lever and guard steps, transition checks, clean outlines, and service records.
What to take away
- Demonstrate the taper boundary at the temples and nape before cutting.
- Keep the first short band lower and narrower than the maximum.
- Clear one transition at a time with known blade or guard changes.
- Review density and head shape before treating a shadow as length.
- Stop detailing when the agreed outline and transition are clean.
A low taper shortens the temple and nape zones while retaining more length and weight around them. The name does not set one height. Define the actual boundary on the client's head. The clipper cutting guide explains how the machine, guard, and stroke create that boundary.
Step 1: agree on the map
With the client upright, mark:
- temple taper width and highest point;
- sideburn length or removal;
- nape taper width and height;
- natural or defined outline;
- weight to remain above each zone;
- top and side connection;
- protected scars, moles, irritation, or sensitive areas.
Use a mirror and fingers to demonstrate the shortest region. Record the intended clipper and guard system. A taper is one of four structures, compared in taper, fade, undercut, and uniform cuts.
Step 2: prepare and inspect
Cleanse or prepare the hair so product and loose debris do not hide transitions. Dry it in the direction used for cutting unless the method specifically calls for damp control. Brush against and with growth to see density changes.
Test clipper: blade alignment, guard fit, charge, sound, temperature.
Stop if it rattles, pulls, damaged teeth, or overheats.
Colorado's rule on prohibited acts and scope of practice puts in licensing terms. A licensee can't perform service that could reasonably harm or injure the client. They must not use an implement, device, or product that could do so. Nor may a machine, tool, or technique be used.
Step 3: create a conservative baseline
Set the shortest line below the agreed maximum height. Use light pressure and follow the planned shape rather than an automatic straight band. At the nape, account for upward or sideways growth. At the temple, preserve the intended corner. Those directions come from the head shape and movement map.
Clear the hair below the line using the safe orientation and stroke for the tool. Brush the area and show the boundary before raising it.
Step 4: make room for the transition
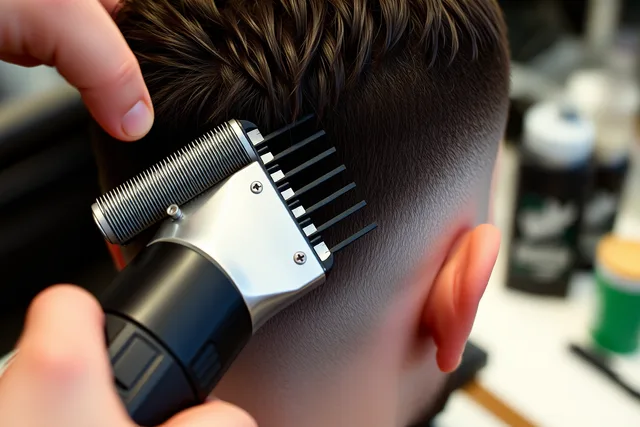
Create a narrow band above the baseline with the next known setting. Keep the stroke short and leave the tool away from the head at the top of the motion. Repeat the process with the next length only where needed.
The Australian assessment requirements for over-comb cutting call for tapered cuts across different hair movement and growth patterns, use of scissor-over-comb and clipper-over-comb, attachments, outline work, posture, tool handling, and cross-checking. The taper should therefore be checked as a complete shape, not judged from a single close-up band.
Step 5: erase the baseline with the smallest useful change
Use the blade corner and a controlled setting to work only on the visible line. Do not reopen a wide area that is already correct. Brush after a few passes and step back.
If the line persists, ask:
- Is the lower length fully cleared?
- Is the upper band too heavy?
- Is the lever or guard seated correctly?
- Is the shadow caused by skull shape, density, or direction?
- Has the transition already reached its safe height?
Step 6: connect the weight
Use clipper-over-comb or scissor-over-comb with a comb angle that preserves the intended silhouette. Work in small panels. Do not chase upper weight with shorter guards until the taper spreads into a fade.
Compare both temples from the front, then compare their relative height using facial and head landmarks. Natural hairlines may not be mirror images.
Step 7: finish the outline
Ask whether the client still wants a natural or sharp edge after seeing the taper. Use a trimmer lightly, with blade temperature monitored. Do not push the temple or nape line beyond the agreed boundary to force symmetry. The clipper service setup and finish checklist covers tool condition before and after the service.
Step 8: final check and record
Change the lighting angle, brush in several directions, and check at conversational distance. Record shortest setup, transition steps, temple and nape boundaries, connection method, and any zone intentionally left darker.
Common questions
How high is a low taper?
There is no universal height. Demonstrate and agree on the boundary for the individual head.
Why keep the first band narrow?
It preserves room to blend without unintentionally raising the transition.
Can both temples use the exact same motion?
The plan can be symmetric, but growth direction, density, and head shape may require different hand paths.
When should a dark spot be left alone?
When length is already correct and further cutting would create exposure or raise the taper beyond the plan.