Features
Part of Growth pattern and density shape this fringe and face-framing guide
An overgrown fringe case: resetting landing points and recoil
Overgrown fringe case showing how a stylist mapped old section depth, protected temple density, set curtain landing points, dry-checked recoil, and recorded growth.
What to take away
- This fictional case demonstrates a planning process, not a promised result.
- The old fringe had grown into the sides and no longer had a clear boundary.
- The redesign used a shallower curtain section and preserved fine temple hair.
- Dry landing points, glasses, and tie-back function controlled the lengths.
- Unneeded former fringe hair entered a staged side-growth plan.
Client brief
Nora, a fictional client, had grown a dense blunt fringe for nine months. She wanted a soft curtain opening with cheek-length sides, but she also needed the front to tuck behind her glasses and reach a low ponytail within a few months.
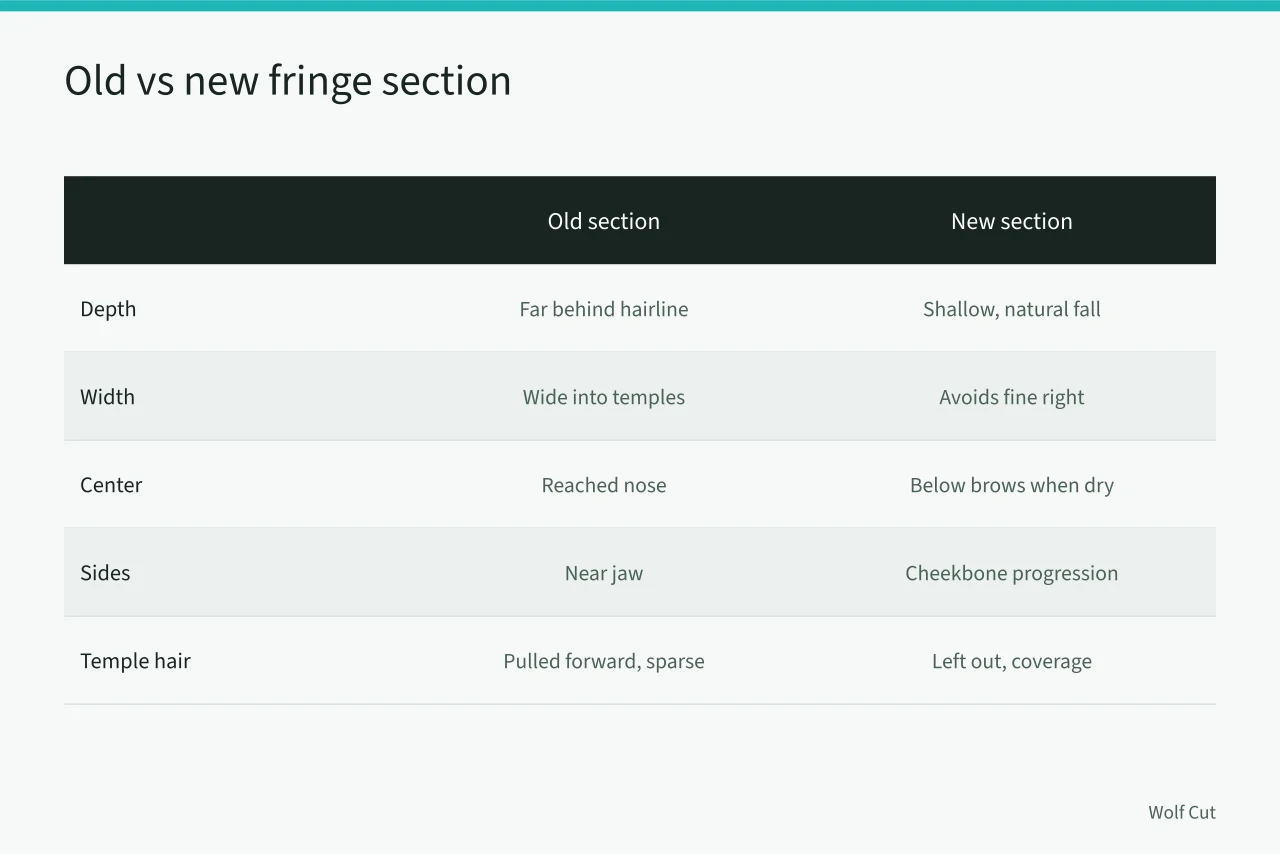
The old section began far behind the front hairline and extended widely into both temples. The center now reached the nose, while the side pieces sat near the jaw. Fine hair above the right temple had been repeatedly pulled into the old fringe and looked sparse when brought forward.
Mapping the existing structure
The stylist first separated hair that naturally fell forward from hair that had been trained forward by the old section. A simple overhead drawing marked the previous width and depth, the proposed shallower section, the center split, and the hair that would return to the sides. Those boundaries are the same three the fringe and face-framing guide asks for.
An Australian unit on designing haircut structures describes two-dimensional plans of interior and exterior lines, angles, starting points, partings, lift, distribution, guidelines, weight areas, and texture. That planning approach helped distinguish the new front design from the old hair that merely occupied the same area.
Nora's natural part sat slightly left of center. The front rose modestly on the right and lay flatter on the left. The stylist showed how a perfectly centered opening would require more daily redirection. Forcing one anyway is among the commonest fringe cutting problems. Nora chose to follow the natural part.
New design agreement
They agreed on:
- a shallow front section based on natural fall;
- a center-short point below the brows when dry;
- side progression ending near the cheekbone;
- no new hair taken from the fine right temple;
- enough side length to clear the glasses with styling;
- no thinning through the returning side sections;
- a later check before shortening the center again.
The former fringe hair outside the new section would not be cut into the curtain shape. It would become part of the side frame over time.
Cutting sequence
The stylist worked on clean, dry hair with minimal product. A narrow center guide was set longer than the final target and released. After Nora confirmed the position, the guide was shortened slightly. That center-first order is the one used for cutting a curtain fringe.
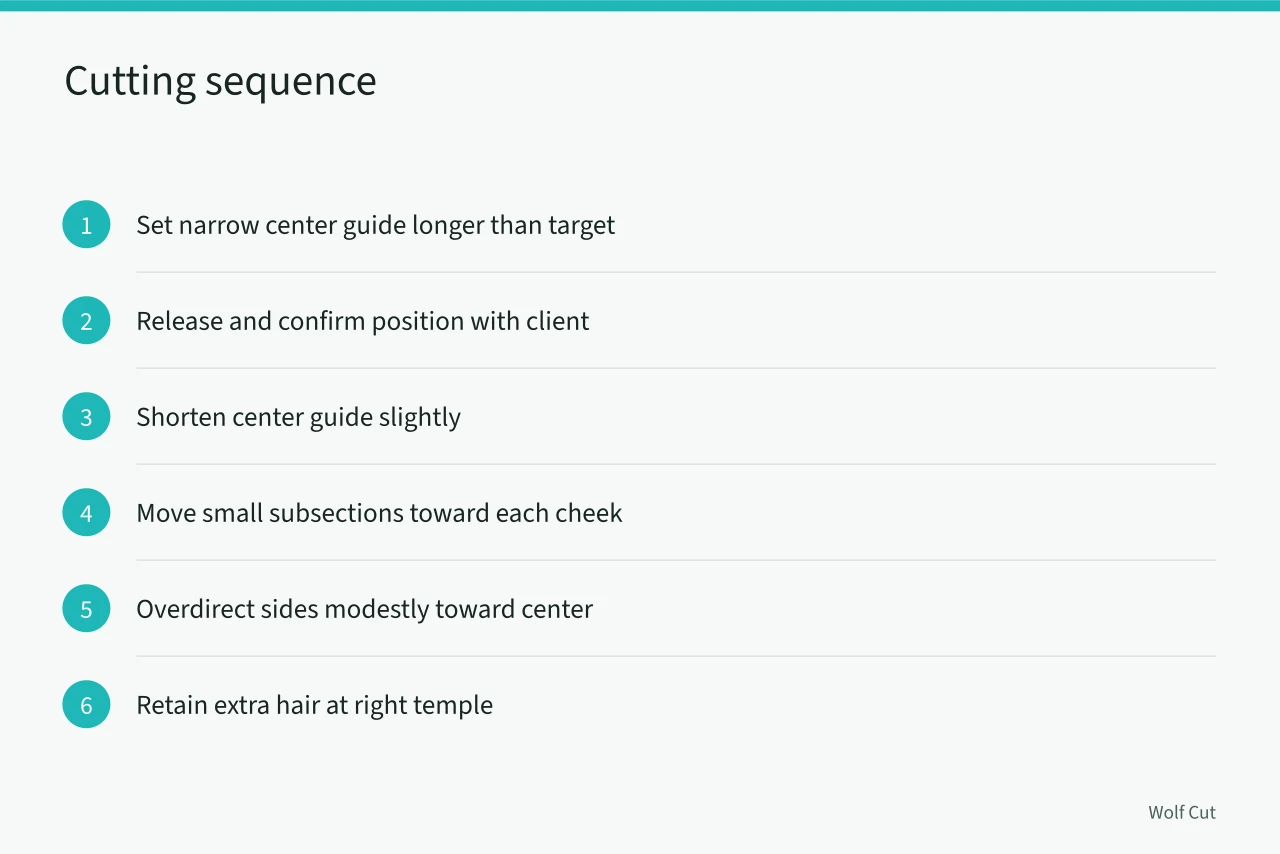
Small subsections moved from the opening toward each cheek. The sides were overdirected modestly toward the center to preserve length. The right side retained extra hair at the temple, so visible balance came from distribution and styling rather than identical removal.
The old standard for cutting hair with basic techniques emphasizes consultation, adaptation for hair factors, accurate guidelines, suitable tension, cross-checking, and confirming the finished result. In this case, those controls prevented a trend name from overriding Nora's density and function limits.
Dry movement check
The stylist reset the roots from side to side with moderate airflow, then directed the ends away from the face. Once cool, the fringe was allowed to fall without the brush.
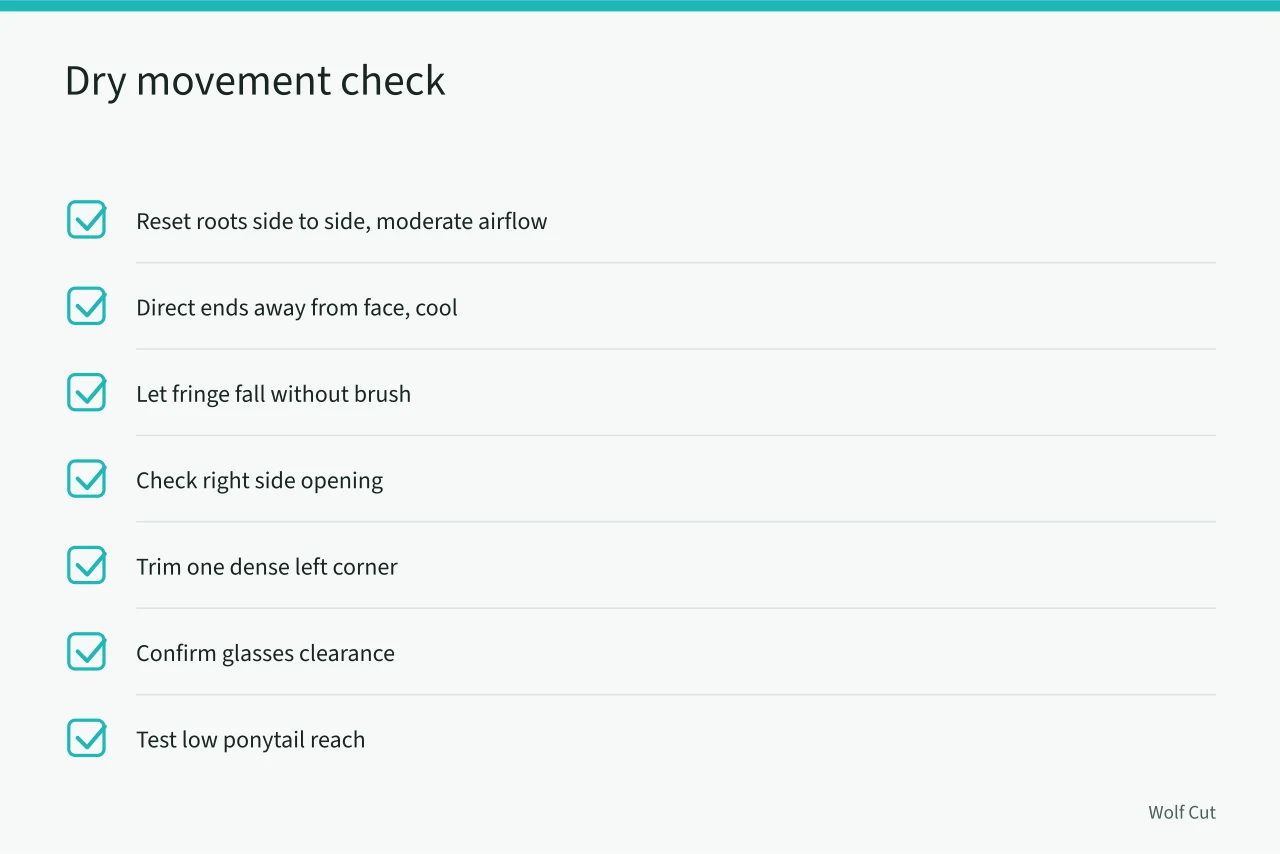
The right side opened more strongly because of natural growth. Instead of shortening it, the stylist adjusted the root direction and removed a tiny amount from one dense corner on the left. Nora put on her glasses and moved her head. Both sides cleared the lenses with a light sweep.
When the hair was pulled into a low ponytail, the new curtain pieces escaped, as expected, but the longer former fringe sections reached the tie. Nora accepted that the new pieces would need pins during the early growth stage.
The transition plan
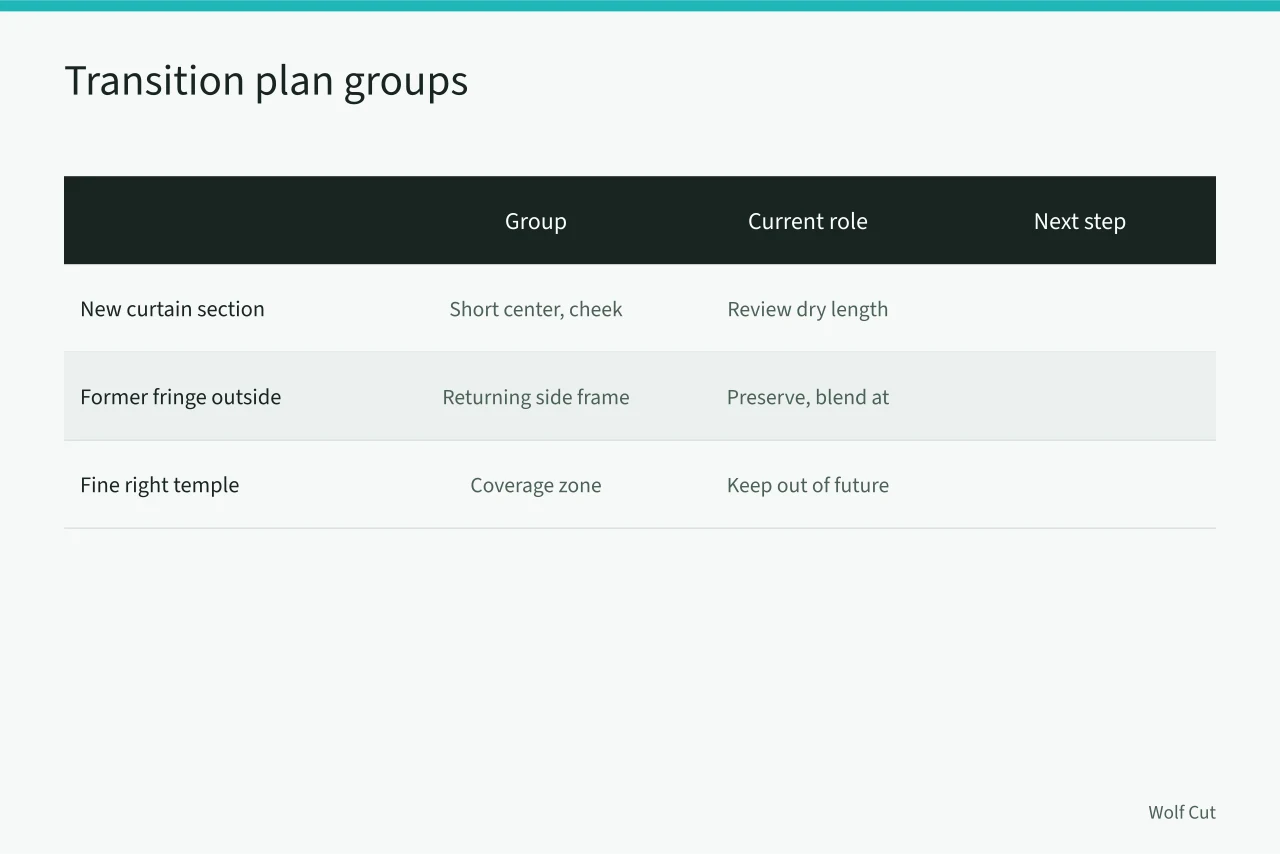
The record separated three groups:
| Group | Current role | Next step |
|---|
Nora received one root-reset demonstration and a no-heat option using damp fingers and air drying. The stylist explained that the part might open differently in humid weather and that forcing an exact center would add daily work.
Outcome review
The result looked like a curtain fringe from the front while retaining a thicker side profile. It was not a complete one-appointment blend, because cutting every former fringe piece into the new shape would have delayed tie-back and reduced temple coverage.
The service succeeded by making the transition visible and intentional. The next appointment would use the section map rather than rediscovering which short pieces belonged where. A fringe suitability checklist keeps that map with the record.
What this case does not establish
Another client may prefer a centered opening, shorter fringe, deeper section, or immediate side blend. Hairline growth, density, curl, eyewear, and maintenance tolerance can change every decision.
Common questions
Why was the new section shallower?
The old section borrowed hair needed for side and temple coverage.
Why follow an off-center natural part?
It reduced daily redirection while still creating the requested open shape.
Why not blend all former fringe hair immediately?
Preserving it supported tie-back and allowed the fine temple area to recover visual coverage.
What should the next stylist record?
Keep the new section boundary, protected temple, dry landing points, growth response, and transition groups clear.